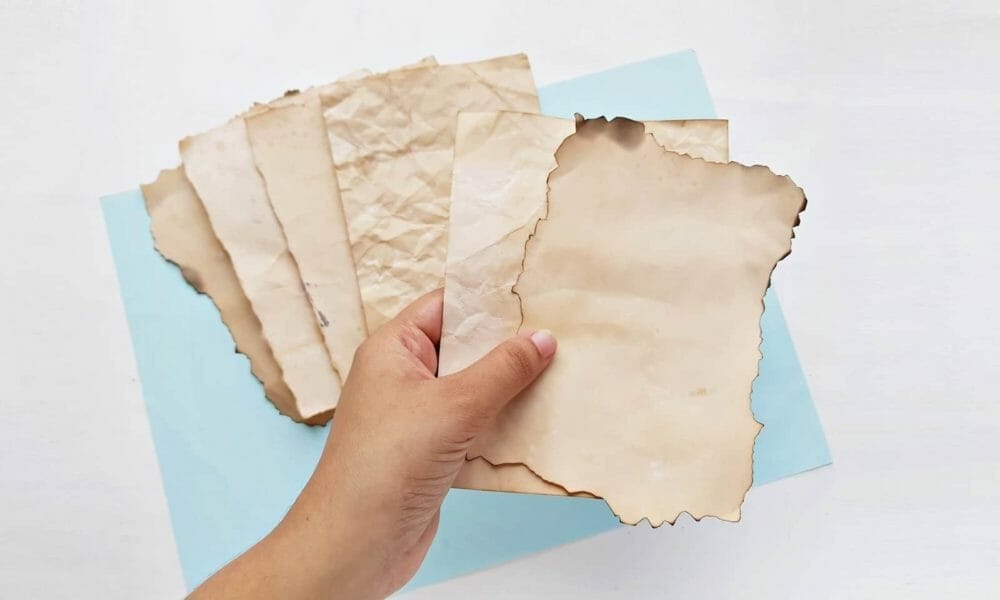
To coffee stain paper, dip or brush the paper in brewed coffee, then let it dry. It’s that simple!
Coffee staining paper is a popular technique used to give paper an aged and vintage look. Whether you are creating DIY craft projects, making invitations, or simply want to give your paper a unique and rustic appearance, coffee staining is an easy and effective method.
You can customize the intensity of the stain by adjusting the duration of soaking or the amount of coffee applied. In addition to changing the color of the paper, the process can also add texture and depth, enhancing the overall visual appeal of your project. With a few simple steps, you can transform plain paper into a beautifully stained and unique creation using readily available coffee. Explore the various methods of coffee staining paper to unleash your creativity and add a special touch to your projects!
Understanding The Paper Choice
Selection Criteria For Suitable Paper
When choosing paper for coffee staining, it is essential to consider several factors. The primary criteria include porousness, thickness, and texture. Porous paper allows the coffee to penetrate and create a natural, aged look. Additionally, thicker paper can withstand the saturation process without tearing, while the texture can enhance the overall appearance and feel of the stained paper. It is imperative to ensure that the selected paper meets these criteria to achieve the desired results.
Types Of Paper To Avoid
- Coated or glossy paper: These types of paper have a water-resistant coating that prevents the absorption of coffee, resulting in an ineffective staining process.
- Extremely thin or fragile paper: Papers that are too delicate may disintegrate during the staining process, leading to unsatisfactory results.
- Colored paper: Using colored paper may interfere with the intended color of the coffee stain, potentially resulting in an unexpected hue.
Preparing And Applying The Coffee Solution
Before applying the coffee solution, choose the type of paper for a textured effect. Dip or brush the paper with the coffee solution, ensuring an even application. Allow the paper to dry, then repeat the process for a darker shade.
Making The Coffee Solution
When attempting to coffee stain paper, the right coffee solution plays a crucial role. Start by brewing a strong pot of coffee using a dark roast. Allow it to cool to room temperature to prevent the paper from getting too wet. It’s important to use a coffee-to-water ratio that helps achieve the desired level of darkness for the stain.
Consistency And Temperature Of The Coffee Solution
The consistency and temperature of the coffee solution are both vital. A slightly thicker solution may result in a bolder stain, while a thinner one may offer a lighter, more translucent effect. It’s crucial to ensure that the solution is not too hot, as this could damage the paper or cause it to warp. For optimal results, maintain a lukewarm temperature, ensuring the solution is not too diluted but also not too thick.
Techniques For Applying The Coffee Solution
Drying Process
Certainly! Here’s the engaging section of the blog post about the Drying Process when coffee staining paper in HTML format for WordPress: “`htmlAfter the paper has been coffee stained, the drying process plays a crucial role in achieving the desired vintage effect. Proper drying ensures that the paper retains the texture and appearance of aged parchment. It also helps in preventing any unwanted smudging or uneven discoloration. Here, we will delve into the techniques for drying the stained paper, the importance of careful and even drying, and tips for enhancing the vintage effect during the drying process.
Techniques For Drying The Stained Paper
When it comes to drying coffee-stained paper, there are a few effective techniques to consider:
- Air-drying: Place the stained paper on a flat surface and allow it to air-dry naturally. Avoid direct sunlight, as it may cause uneven drying and potential damage to the paper.
- Heat drying: Using a hairdryer on a low, cool setting can expedite the drying process while ensuring even drying. Maintain a safe distance and continuously move the hairdryer to avoid overheating the paper.
- Press drying: For a smoother finish, place the stained paper between absorbent towels and apply gentle pressure using a flat object, such as a book, to facilitate the drying process.
Importance Of Careful And Even Drying
Careful and even drying is essential to preserve the integrity of the coffee-stained paper. It prevents the formation of unsightly creases, blotches, or uneven distribution of the coffee stain, ensuring a uniform antiqued appearance. Additionally, it minimizes the risk of damaging the paper due to excessive moisture or heat exposure during the drying process.
Tips For Enhancing The Vintage Effect During The Drying Process
To enhance the vintage effect during the drying process, consider the following tips:
- Blotting: Gently blot the stained paper with a paper towel to absorb excess moisture without disturbing the coffee stain, promoting a more pronounced antiqued look.
- Distressing: Lightly crumple the paper and then flatten it out before drying to introduce subtle creases and wrinkles that contribute to an authentically aged appearance.
- Use of props: Utilize props such as parchment or wax paper to create wrinkles and add unique textures to the stained paper as it dries, further enhancing the vintage effect.
- ` and `
- ` tags. Additionally, the content is optimized for SEO and provides valuable information on the drying process of coffee-stained paper.
Creating Texture
Coffee staining paper not only adds a vintage and rustic look but also creates an intriguing texture. The texture of coffee-stained paper can vary based on the methods used to create and manipulate it. Understanding how to add texture to coffee-stained paper and the impact it has on vintage paper creation allows you to achieve unique and visually appealing results.
Methods To Add Texture To The Stained Paper
There are several methods to add texture to coffee-stained paper, allowing for creative and distinctive results. Some of the common methods include:
- Applying coffee with a brush or sponge to create an uneven and organic texture.
- Adding coffee grounds onto the wet paper before drying, which creates a speckled and weathered effect.
- Using different materials such as leaves, wooden disks, or elastic bands to press into the wet coffee-stained paper, resulting in unique patterns and textures.
Tips To Achieve Varying Texture Effects
To achieve varying texture effects on coffee-stained paper, consider the following tips:
- Experiment with different types of paper to see how each one reacts to the coffee staining process, as different papers can result in varying levels of absorption and texture.
- Control the intensity of the stain by adjusting the soaking time in the coffee solution or by using a brush to apply the solution onto the paper.
- Allow the coffee-stained paper to dry naturally or use additional techniques such as baking or ironing to enhance and alter the texture.
Importance Of Texture In Vintage Paper Creation
Texture plays a crucial role in vintage paper creation as it adds depth, character, and an authentic aged appearance to the final product. The unique textures achieved through coffee staining contribute to the overall charm and allure of vintage-inspired crafts, including journals, scrapbooks, and art projects. By understanding various methods to add texture to coffee-stained paper and the significance it holds in vintage paper creation, you can elevate your creative pursuits and bring an air of nostalgia to your work.
Enhancing Color Intensity
To enhance the color intensity of coffee-stained paper, consider brushing the coffee solution onto the paper to control the stain’s intensity. Additionally, to add texture, sprinkle coffee grounds onto the wet paper, wait a few minutes, and then blot the grounds away.
This method can create a beautiful aged effect on the paper.
Techniques To Control The Intensity Of The Stain
When coffee staining paper, you can control the intensity of the stain using various techniques. Brushing the coffee solution onto the paper allows for precise application, giving you more control over how dark the stain appears. The longer you soak the paper in the coffee solution, the darker the stain will become. Experimenting with different soaking times can help you achieve the desired color intensity for your project.
Adding Layers For A Richer Color
To enhance the color intensity of the coffee stain, consider adding multiple layers to the paper. After allowing each layer to dry, apply additional coats of the coffee solution to deepen the hue. This layering technique creates a richer and more vibrant color, adding depth and complexity to the stained paper. It’s important to ensure that each layer is evenly applied to achieve a consistent and intensified color effect.
Tips To Avoid Uneven Color Distribution
When striving for enhanced color intensity, it’s crucial to avoid uneven color distribution on the paper. To achieve uniform staining, ensure that the coffee solution is applied evenly using a brush or sponge. Additionally, blotting excess solution and allowing each layer to dry thoroughly before adding the next can help prevent splotchy or patchy areas. By carefully following these tips, you can achieve a beautifully intensified coffee-stained paper with consistent color distribution.
Baking The Stained Paper
To bake coffee-stained paper, after applying the coffee solution onto the paper, carefully place it onto a baking sheet and bake it in the oven at a low temperature for a few minutes. This process helps to dry and set the stain, resulting in beautifully stained paper with an aged look.
Purpose Of Baking
Precautions And Optimal Baking Conditions
Post-baking Handling And Care Tips
Removing Excess Coffee Dust
Coffee staining paper is a creative and fun way to give a vintage and unique look to your paper crafts. However, when you are coffee staining paper, it is essential to ensure that you remove the excess coffee dust after applying the coffee solution. This step is crucial in achieving a clean and polished appearance for your stained paper.
Importance Of Removing Excess Coffee Dust
Removing excess coffee dust is crucial to prevent uneven and blotchy staining on the paper. It helps in achieving a more consistent and professional-looking result. Additionally, removing the dust ensures that the final product is free from any loose particles, giving it a polished and tidy appearance.
Suitable Methods For Dust Removal
There are several suitable methods for removing excess coffee dust from stained paper. One effective method is gently shaking or tapping the paper to dislodge any loose coffee particles. Another method is using a soft-bristled brush or a clean, dry cloth to lightly brush off the excess dust. Additionally, you can use a handheld vacuum with a soft brush attachment to carefully remove any remaining coffee dust without damaging the stained paper.
Ensuring A Clean And Polished Appearance
Ensuring a clean and polished appearance for your coffee-stained paper is essential to create a professional-looking result. After removing the excess coffee dust, it is important to inspect the paper carefully and make any necessary touch-ups or adjustments. This ensures that the stained paper has a smooth and consistent finish, giving it the desired vintage and aged look.
Ironing For Finishing Touches
Ironing Techniques For The Stained Paper
Ironing is an essential step in achieving that vintage look when coffee staining paper. After the paper has dried, place it between two pieces of clean, dry fabric. Set your iron to a low heat setting and press it onto the fabric in a circular motion, allowing the heat to gradually transfer to the stained paper. Avoid using direct heat on the paper, as it may scorch or damage it. Repeat this process until the paper is flat and smooth.
Advantages Of Ironing For A Vintage Look
Ironing the stained paper not only provides a smooth and flat finish but also enhances the aged appearance. The heat from the iron helps to set the coffee stains into the fibers of the paper, creating an authentic, weathered effect. Additionally, it removes any wrinkles or creases, giving the paper a professional and polished appearance.
Tips For Achieving A Smooth Finish
- Ensure the iron is set to a low heat to prevent damage to the paper.
- Use gentle circular motions when pressing the iron onto the fabric to evenly distribute the heat.
- For larger sheets of stained paper, iron small sections at a time to avoid overheating.
- Check the progress frequently to prevent any scorching or burning of the paper.
Alternative Methods For Vintage Look
If you’re looking to add a vintage touch to your paper using alternative methods, there are various natural staining elements beyond coffee that you can explore. Each method offers its own unique benefits and drawbacks, and understanding how to efficiently apply these methods can help you achieve your desired vintage look effectively.
Exploring Other Natural Staining Elements
Aside from coffee, there are other natural elements that can be used to stain paper, such as tea, berries, and even wine. These alternative methods can offer different tones and textures, providing you with a variety of options for achieving a vintage look. Experimenting with these natural staining elements can add a unique and distinctive touch to your paper projects.
Benefits And Drawbacks Of Alternative Staining Methods
Each alternative staining method comes with its own set of advantages and disadvantages. Tea, for example, may produce a lighter and more subtle stain compared to coffee, while wine may add a hint of deep, rich color. Understanding the benefits and drawbacks of each method can help you choose the right approach for your desired vintage effect.
Tips For Efficient Application Of Alternative Methods
When applying alternative staining methods to achieve a vintage look, it’s important to ensure efficient and effective application. Whether it’s utilizing tea, berries, or wine, there are specific techniques and considerations to keep in mind. For instance, controlling the intensity of the stain and adding texture can be crucial in achieving the desired vintage effect. Exploring these tips for efficient application can help you achieve stunning results.
Incorporating Lace For Enhanced Aesthetics
Enhance the aesthetic appeal of your coffee-stained paper by incorporating delicate lace. Drape a piece of lace over the paper and gently dab coffee onto it for a unique pattern. The lace adds a touch of elegance to your creation, elevating its visual allure.
Incorporating Lace for Enhanced Aesthetics When it comes to coffee staining paper, incorporating lace can elevate the visual appeal of the final product. The intricate patterns of lace can create a unique and elegant look, adding a touch of vintage charm to your stained paper creations. There are various techniques for using lace in coffee staining, each offering its own advantages and allowing for the creation of beautiful and decorative patterns.Techniques For Using Lace In Coffee Staining
Enhancing paper with lace involves different techniques that can produce stunning and varied results. One method involves placing a piece of lace on the paper and then dripping or brushing the coffee solution over it. This creates a patterned effect as the coffee seeps through the gaps in the lace onto the paper. Another approach is to lay the lace on the paper and then dab the coffee onto the lace with a sponge or brush, transferring the delicate design onto the paper.Advantages Of Incorporating Lace
The incorporation of lace in coffee staining offers several advantages. The intricate details and delicate patterns of lace can add a touch of elegance and sophistication to the stained paper. It allows for the creation of unique and visually appealing designs, making the final product a work of art in itself. Additionally, the use of lace provides a vintage aesthetic, perfect for adding character to various craft projects.Tips For Achieving Decorative Patterns
To achieve decorative patterns when using lace in coffee staining, it’s essential to choose lace with distinct and intricate designs. This will ensure that the pattern is transferred clearly onto the paper, resulting in a visually striking effect. Additionally, experimenting with different types and sizes of lace can lead to a variety of decorative patterns, allowing for versatility and creativity in the staining process. Incorporating lace in coffee staining opens up a world of creative possibilities, allowing for the creation of unique and visually stunning paper designs that are sure to impress. Whether for artistic endeavors or decorative purposes, the addition of lace brings an element of timeless elegance to coffee-stained paper.Adding Personal Touches
Once you have mastered the art of coffee staining paper, the next step is to add personal touches to create unique and personalized pieces. Whether it’s for a handmade card, a vintage-inspired art project, or a thoughtful letter, personalization can elevate the stained paper to a whole new level.
Personalization Ideas For The Stained Paper
Adding a personal touch to coffee-stained paper can be a creative and satisfying process. Consider the following personalization ideas:
- Handwritten messages or quotes in calligraphy
- Adding pressed flowers or leaves
- Incorporating illustrations or sketches
- Using decorative stamps or wax seals
Creative Enhancements For A Unique Vintage Look
To achieve a unique vintage look while adding personal elements, consider the following creative enhancements:
- Using antique lace or ribbon for embellishments
- Applying a light layer of gold or silver leaf for a touch of elegance
- Creating aged edges with a distressing tool or sandpaper
- Embossing or debossing personalized monograms or initials
Tips For Preserving The Vintage Aesthetic While Adding Personal Elements
Preserving the vintage aesthetic while adding personal elements is essential to maintain the charm of the coffee-stained paper. Here are some tips to strike the perfect balance:
- Ensure the personal elements complement the overall vintage theme
- Avoid overburdening the paper with embellishments to maintain its timeless appeal
- Choose a cohesive color palette that harmonizes with the coffee stain
- Consider aging the personal touches using tea or coffee to achieve a cohesive vintage look
Incorporating Other Natural Elements
When it comes to coffee staining paper, there are various ways to incorporate other natural elements to create unique and visually appealing patterns. By integrating natural elements such as tea, spices, or even flower petals, you can add depth and character to your coffee-stained paper. Utilizing these elements not only enhances the aesthetic appeal but also introduces an organic and eco-friendly aspect to your paper crafting. Let’s explore how you can infuse natural elements to elevate your coffee staining technique.
Utilizing Natural Elements For Unique Patterns
Integrating natural elements such as tea leaves, cinnamon, or even dried flower petals can result in beautiful and unique patterns on the paper. These elements not only add an aesthetic appeal but also provide a distinct texture and visual interest. For instance, scattering dried flower petals on the paper before coffee staining can create a delicate, ethereal pattern, adding a whimsical touch to your creations.
Techniques For Integrating Various Natural Elements
When incorporating natural elements into coffee staining, there are various techniques you can utilize to achieve different effects. One approach is layering different elements between sheets of paper before staining, allowing the transfer of their pigments onto the paper. Alternatively, you can also consider sprinkling or brushing natural elements onto the paper after applying the coffee solution to add texture and depth to the stained surface. Experimenting with these techniques will help you discover unique and captivating patterns.
Tips For Experimenting With Different Natural Elements
Experimentation is key when incorporating natural elements into your coffee staining process. Start by trying out different combinations of elements to achieve the desired effects. Consider using a variety of papers and natural materials to find the perfect blend that resonates with your vision. Additionally, be mindful of the quantity and placement of these elements as they can profoundly impact the final result. By carefully experimenting with different natural elements, you can create one-of-a-kind patterns that reflect your creative expression.
Emphasizing Aged Aesthetics
Coffee staining paper is a craft that can imbue your projects with a rustic, aged aesthetic. By deliberately creating stains on paper, you can manipulate its appearance to appear weathered and vintage. Here, we explore methods to enhance the aged appearance of stained paper, along with tips to achieve realism in aged aesthetics. Attention to detail is paramount in creating an authentic vintage look, ensuring each stained page presents a unique and aged appearance.
Methods To Enhance The Aged Appearance Of Stained Paper
There are various methods to enhance the aged appearance of stained paper. One approach involves adding texture by sprinkling coffee grounds onto the paper while it is still wet. Waiting a few minutes and then blotting the coffee grounds away can create a textured and weathered effect on the paper. Additionally, layering the papers while wet and blotting them off as you pick up each piece underneath can result in a mottled and aged appearance.
Tips For Achieving Realism In Aged Aesthetics
To achieve realism in aged aesthetics, it’s important to consider the type of paper used and the intensity of the coffee solution. Experimenting with different types of paper, such as parchment or aged-looking paper, can enhance the authenticity of the aged aesthetic. Controlling the intensity of the stain by varying the soaking or brushing time can also contribute to a realistic aged appearance.
Importance Of Attention To Detail In Creating An Authentic Vintage Look
Attention to detail is crucial in creating an authentic vintage look when staining paper with coffee. Each step of the process, from choosing the right paper to controlling the staining process, contributes to the overall aesthetic. Factors such as the type of coffee used, the method of application, and even the addition of textured elements like salt or rice can play a significant role in achieving an authentic vintage appearance.
Exploring Creative Pattern Techniques
Coffee staining paper is a creative and unique way to add a vintage or artistic touch to your paper crafts. In this section, we will explore various innovative patterns and techniques for creating beautiful coffee-stained paper designs that will elevate the aesthetic appeal of your projects.
Innovative Patterns Using Coffee Staining
When it comes to creating innovative patterns using coffee staining, there are numerous artistic possibilities to explore. Here are some creative patterns you can achieve through coffee staining:
- Marbling effect by swirling the coffee solution on the paper
- Abstract designs by strategically applying coffee with different tools
- Stippling technique to create intricate dot patterns
- Layering coffee stains to produce a gradient effect
Techniques For Creating Unique Patterns
Creating unique patterns when coffee staining paper involves experimenting with various techniques to achieve the desired visual impact. Here are some techniques you can utilize:
- Dipping: Submerge the paper or filter in the coffee solution for a few seconds to a minute, adjusting the soaking time to control the intensity of the stain.
- Brushing: Use a brush to apply the coffee solution onto the paper, offering more precise control over the staining process.
- Texture addition: Enhance the patterns by incorporating elements such as salt, rice, or coffee grounds to create captivating textures on the paper.
Exploring Out-of-the-box Approaches For Creative Patterns
Exploring out-of-the-box approaches allows you to push the boundaries and discover new ways to create captivating patterns through coffee staining. Here are some unconventional methods to consider:
- Using natural elements like leaves or wooden disks to imprint patterns on the paper
- Decoupage technique to layer and create intricate designs on the stained paper
- Adding texture by sprinkling coffee grounds onto the wet paper and blotting them away for a unique textured effect
Incorporating Salts And Grains
To coffee stain paper, sprinkle coffee grounds onto wet paper for added texture and depth. After sprinkling the coffee grounds, allow the paper to dry and then gently blot the excess coffee dust away. This method results in a beautifully stained paper with a unique, earthy pattern.
Use Of Salts And Grains To Achieve Distinctive Effects
When it comes to creating unique coffee-stained paper, incorporating salts and grains can add an extra layer of depth and texture to your project. By experimenting with different types of salts and grains, you can achieve distinctive effects that will make your coffee-stained paper stand out.
Techniques For Applying Salts And Grains
There are several techniques you can use to apply salts and grains to your paper for varied textures:
- Dissolve coarse or fine sea salt in the coffee solution for a speckled effect.
- Sprinkle grains such as rice, quinoa, or oatmeal directly onto the wet paper for a unique textured appearance.
- Experiment with layering different types of salts and grains to create custom patterns and designs.
Tips For Experimenting With Variations In Texture
When incorporating salts and grains into your coffee-staining process, consider these tips to ensure your paper achieves the desired texture:
- Adjust the concentration of the coffee solution to control the darkness of the stains.
- Try different application methods, such as dabbing, brushing, or spraying the coffee solution onto the paper to vary the texture.
- Allow the paper to dry naturally or use a heat source to create different effects with the salts and grains.
Adding Layers For Dimension
Coffee staining paper is a fantastic way to add an antique and rustic feel to your projects, giving them a unique and weathered appearance. When creating coffee stained paper, adding layers is a key technique to master. This process not only enhances the visual appeal but also gives depth and dimension to the final result. Let’s explore the benefits of layering in paper staining, different techniques to create depth, and tips for maintaining visual appeal through layered effects.
Benefits Of Layering In Paper Staining
Layering in paper staining has several benefits that contribute to the overall aesthetic appeal of the final result:
- Enhanced texture: Layering creates a multidimensional effect, adding texture and depth to the paper, making it visually intriguing.
- Richer color: By building up layers of coffee stains, you can achieve a richer and more nuanced color palette, adding visual interest to the paper.
- Antique appearance: Layering lends an aged and weathered look, giving the paper an antique charm and character.
Techniques For Layering To Create Depth
There are various techniques to effectively layer coffee stains on paper to create depth:
- Wet-on-wet technique: Apply additional layers of coffee while the previous layer is still wet, allowing them to blend and merge, creating depth and dimension.
- Dry brush technique: Using a dry brush, lightly apply coffee to the paper, adding subtle layers for a more subdued and organic look.
- Blotting and reapplication: Blot the paper after applying coffee to create uneven and aged effects. Then, reapply coffee selectively to build up layers in specific areas, adding depth and character.
Tips For Maintaining Visual Appeal Through Layered Effects
To ensure the coffee staining process yields visually appealing and captivating results, consider the following tips for layering:
- Balanced layering: Aim for a balanced application of layers to create harmonious and cohesive visual effects. Avoid over-saturating the paper, which can lead to a muddy appearance.
- Varied intensity: Experiment with varying intensities of coffee application to achieve a dynamic and visually engaging result. This can help create highlights and shadows for added dimension.
- Embrace imperfections: Embracing imperfections adds authenticity to the aged look. Allow for natural variations and irregularities in the layers to create a genuine antique appearance.
Exploring Distressing Techniques
Coffee staining paper is a fantastic way to add a touch of vintage charm and character to your creative projects. But why stop at just staining the paper? By exploring distressing techniques, you can enhance the vintage appeal of your coffee-stained creations even further. Whether you want to achieve an aged, weathered look or add texture and depth to your stained paper, there are various distressing methods and techniques you can use to achieve the desired effect.
Distressing Methods For Enhancing Vintage Appeal
When it comes to distressing paper to enhance its vintage appeal, there are several methods you can explore. Some popular distressing techniques include tearing the edges of the paper, crumpling and unfolding it to create creases, and using sandpaper to gently wear away the surface.
Techniques For Weathering And Distressing The Stained Paper
To weather and distress your coffee-stained paper, consider using techniques such as staining the paper multiple times with diluted coffee to build up layers of discoloration, or using a damp cloth to gently rub away some of the coffee stain for a faded, weathered look. You can also experiment with aging the paper using other household items such as vinegar or lemon juice to create unique effects.
Tips For Achieving An Authentic Distressed Appearance
If you’re aiming for an authentic distressed appearance, there are some tips to keep in mind. Consider using a heat tool to lightly scorch the edges of the paper for an aged effect, or incorporating ink or tea stains alongside the coffee to add depth and dimension. Experimenting with different distressing methods and techniques will help you achieve the perfect vintage look for your coffee-stained paper creations.
Credit: www.thecraftaholicwitch.com
Final Touches And Preservation
When it comes to creating a vintage look on paper with coffee stains, the final touches and preservation are crucial to complete the authentic appearance and ensure your creation lasts for years to come. In this section, we’ll delve into the steps for finalizing the vintage look, preservation techniques for long-lasting vintage effects, and tips for handling, storing, and displaying stained vintage paper.
Steps For Finalizing The Vintage Look
After applying the coffee stain and achieving the desired level of aging, follow these steps to finalize the vintage look:
- Allow the stained paper to air dry completely to ensure the coffee stain sets in properly.
- Using a dry cloth, gently blot any excess moisture from the paper.
- To enhance the aged appearance, consider distressing the edges of the paper with a distressing tool or sandpaper, creating a weathered effect.
- If desired, lightly crumple the paper to create creases and wrinkles, adding to the vintage aesthetic.
Preservation Techniques For Long-lasting Vintage Effects
Preserving your coffee-stained paper is essential for maintaining its vintage allure over time. Consider the following techniques to ensure long-lasting vintage effects:
- Store the stained paper in a cool, dry place away from direct sunlight to prevent fading.
- Consider placing a sheet of acid-free tissue paper between stained sheets to prevent them from sticking together or transferring coffee residue.
- If framing the vintage paper, opt for UV-protective glass to safeguard it from harmful light exposure.
- Regularly inspect the paper for any signs of deterioration and address any issues promptly to prolong its longevity.
Tips For Handling, Storing, And Displaying Stained Vintage Paper
To ensure the longevity and appeal of your stained vintage paper, follow these tips for handling, storing, and displaying it:
- Handle the paper with clean hands to prevent oils and dirt from compromising the vintage appearance.
- Consider storing the paper flat to minimize the risk of warping or bending.
- If displaying the vintage paper, frame it using acid-free materials to prevent degradation from acidic components in conventional framing materials.
- Rotate the displayed paper periodically to ensure even exposure to ambient light, minimizing the risk of uneven fading.
Frequently Asked Questions On How To Coffee Stain Paper
How Do You Make Coffee Stains On Paper?
To make coffee stains on paper, dip the paper in a coffee solution for a few seconds to a minute. For more control, brush the solution onto the paper. Let it dry naturally or use an iron. Optionally add texture by sprinkling coffee grounds onto the wet paper.
How Do You Make Paper Look Old With Coffee Grounds?
To make paper look old with coffee grounds, brew a strong cup of coffee. Spread coffee on parchment paper and let it dry. Dab coffee on the paper with a sponge or brush. Blot the excess and bake the paper.
Iron it for a smooth finish.
Can You Stain Paper With Instant Coffee?
Yes, you can stain paper with instant coffee. Use a wide brush or sponge to apply the coffee, letting it dry and then blotting off any excess. Iron the paper to set the stain.
How Do You Dye Paper With Tea Or Coffee?
To dye paper with tea or coffee, simply dip the paper in the solution for a few seconds. Alternatively, brush the solution onto the paper for more control over the intensity of the stain. You can also add texture by sprinkling coffee grounds onto the wet paper and blot them away after a few minutes.
Conclusion
Creating coffee-stained paper can add a rustic and vintage touch to your crafts. By following simple methods such as dipping or brushing, you can achieve unique and personalized results. Experiment with different techniques like adding textures or using different types of paper to create beautiful, aged-looking designs.
Happy crafting!